Demand & Content
How to build a winning outbound email strategy at your startup
Outbound sales is the backbone of the majority of B2B companies — there’s even an entire website dedicated to sharing the best sales emails! Even product-led companies like InVision rely on Enterprise for 50% of their revenue. While these examples are great, you need a strong foundation (infrastructure) before you send your first email, otherwise your outbound efforts are likely to fall flat.
In this guide, we’ll break down all the necessary, practical steps to building your first outbound email campaign for your startup: creating a new domain, setting up email authorization, building lists, and warming up. By following these steps, you can ensure you’re setting yourself up for success, and you won’t have to waste time fixing things down the road.
Create a new business domain
While it may be delay results, you need to avoid sending emails immediately from your core domain (i.e. divisional.co). Since you don’t know how those emails will perform - whether they’ll be well-received by prospects, marked as spam, etc. - you will risk hurting your domain’s reputation if you send immediately. Startups that do this will bear unwanted side effects, like having the emails of your founder(s), customer support, etc. end up in spam. Future outbound efforts will also be harmed, as it’ll be difficult to get replies if no one is seeing your email.
You can avoid this problem by starting with a new business domain and email, that is separate from your regular business email. These can be referred to as “burner” domains. You can begin with 1 burner domain, and as your startup email marketing scales, you can add more. When creating your new domain, ensure it retains some connection to your primary one so it’s still recognizable.
Here are two ways you can create a burner domain:
- By changing the extension (e.g. .io, .co, .us)
- By using a prefix (e.g. try-, get-)
For example, if the primary domain is “divisional.co”, examples of burner domains are:
You can also use a combination of the two (e.g. trydivisional.us).
Authenticate your domain
Email authentication is an important step as it helps improve your deliverability rates with email service providers. A deliverability rate is the success rate that your domain has in delivering emails — so the better your rate, the less likely a mail provider is to mark your emails as spam and send them to junk. It can be a tedious task to authenticate, but thankfully, it only needs to be done once for every new domain.
There are 3 records you need to add to the DNS page of your domain: DKIM (DomainKeys Identified Mail), DMARC (Domain-based Message Authentication, Reporting, and Conformance), and SPF (Sender Policy Framework).
How to setup DKIM & DMARC
Configure SPF records
This step is not necessary for Google Domains, which has this auto setup.
- Go to your domain host (e.g. GoDaddy, Cloudflare, etc.)
- Go to ‘DNS Management’
- Click ‘Add a record’
- Enter the following values for the DNS record:
Type: TXT
Name: @
Host: v=spf1 include:_spf.google.com ~all (Always the same for GSuite)
Value: v=DKIM1; k=rsa; p=MIIBIjANBgkqhkiG9w0BAQEFAAOCAQ8AMIIBCgKCAQEAswf+6iX7m2OpprcrnHVPYrcHboqmd6MamaBAthJRYEncid5t3cie/QYLcociR7u+lceaYMeNccpPqUIMF1KHooa9ImM6RhAwCNtjpWlB+2XWGSPq0Hgb5gKyxocWaJC4+1Q4vDSEhr2ezw0GyLtTFUw7hKuvGxAy5iL0M41+gQVnVmlbD5yKviyYVQJc0c0gQT+yvePJh8dhtlBL9JQcSnJKlWr/T2lxw2yn1kFYO6SLecUPWJEaW72C01lLjfy4g1NSeoGyOEclkMAluwEpHgNXekXEpDb0Rd/0QOseXzXNsovMA0Lh5k027Rml5Ugp+rhJYzLygHfYuG9Xg1IwpQIDAQABTime to live: 1 hour
Time to live: 1 hour
Use MX Toolbox to verify if SPF records have been installed correctly.
Note: It may take 24-48 hours to update.
Configure DKIM records
- Go to your Google Admin account
- Choose Apps >> Google Workspace >> GMail >> Authenticate Email
- Select the right domain (if you have multiple domains under 1 GSuite admin account)
- Click “GENERATE NEW RECORD”
- Go to your domain host again
- Add the following values:
Type: TXT
Name: google._domainkey
Time to live: 1 hour
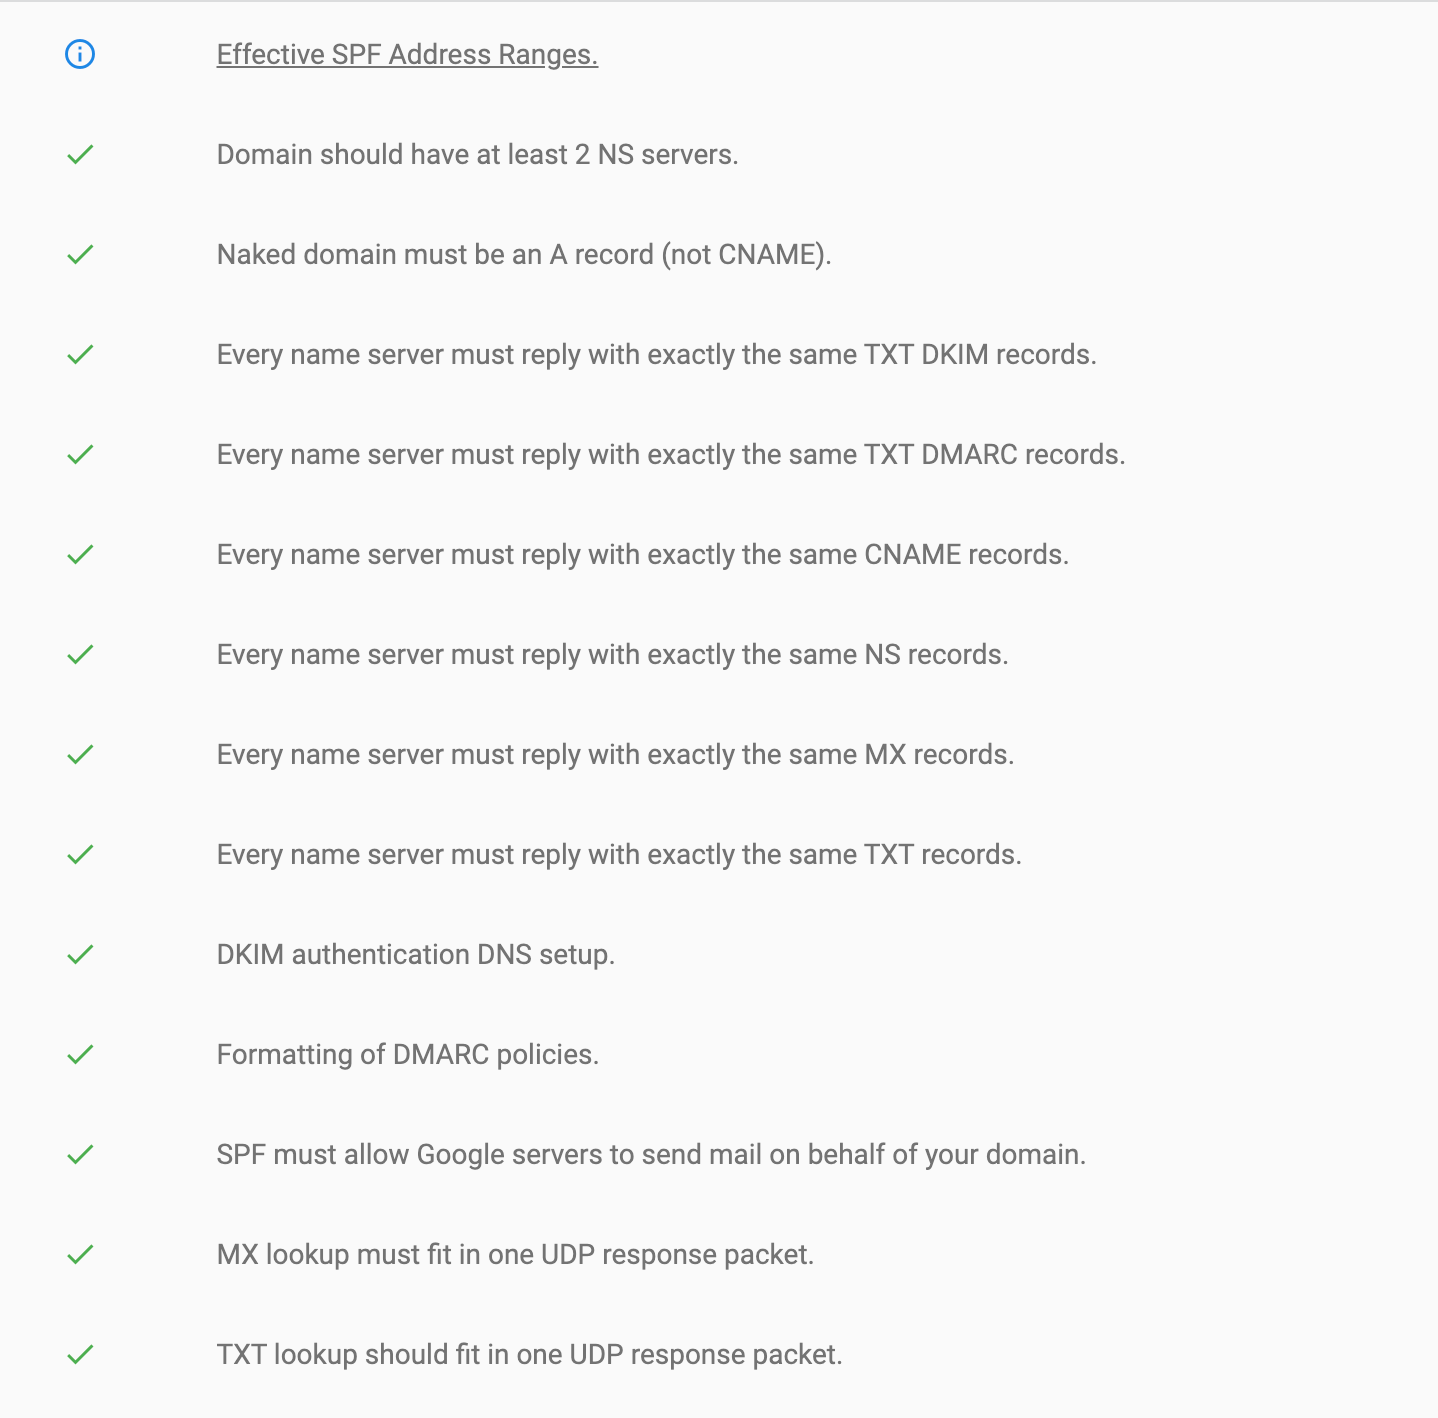
To verify if DKIM is working properly, go to Google Admin Toolbox, enter domain, and if successful, you should see the following:
Configure DMARC records
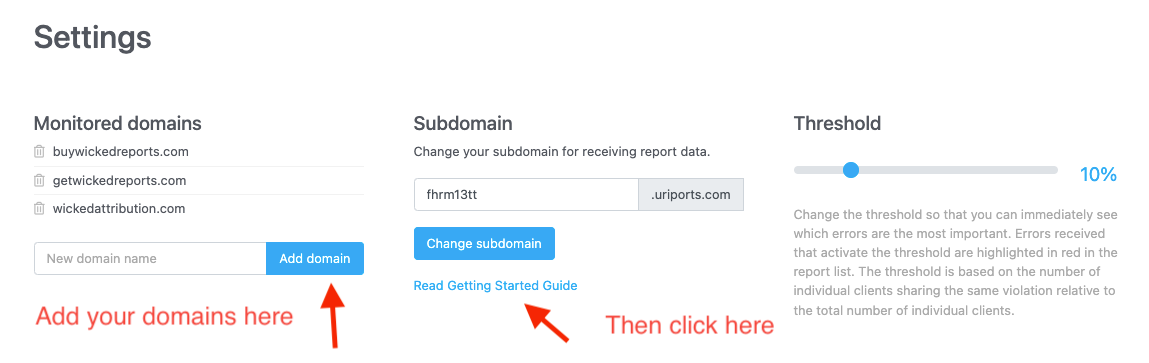
- Sign up for URI Ports (Sand Plan)
- Go to Settings
- Add the burner domains that you’ve purchased (e.g. trydivisional.co)
- Click the ‘Read Getting Started Guide’
Add the following values to your DNS records:
**Replace with info from your URI reports account
HOST: _dmarc
TYPE: TXT
VALUE: v=DMARC1; p=none; rua=mailto:dmarc@43zcqfd8.uriports.com;ruf=mailto:dmarc@43zcqfd8.uriports.com; fo=1:d:s
When you have updated your DNS TXT records, ensure you verify in your URIports account that everything is set up correctly by logging into your URIports account and checking the section "Monitored domains" on your dashboard.
Click the "Check all" link and view the results. The domains should have a green check icon. If there is an exclamation icon, hover your mouse cursor above the error to view the given error.
Setup domain forwarding/redirect for burner domains to https:{company primary domain}
- You can usually do this from the dashboard of your domain host, i.e. for Google Domains
- Go to ‘Manage’ from domains.google.com
- Click on ‘Website’ (left-hand menu)
- Click on ‘Forward domain’ and enter the URL of your core website (i.e. divisional.co)
Note: It may take 24-48 hours for the forwarding to work.
Build a prospecting list
Your outbound prospecting process, aka how you build your list of contacts, will play a huge part in the success of your outbound efforts. There are 2 key questions to think about before beginning to build your list:
- What is the goal for your outbound email campaign? Is it to increase website traffic, grow a subscriber list, generate high-quality leads, or something else? Having a specific goal is crucial to help you build your list out.
- Who is your ideal/target persona? Determine what your ideal customer profile (ICP) is, considering factors like industry, location, and role. The best way to see a positive ROI for your outbound efforts is to ensure you’re targeting the right people to begin with.
Once you’ve decided on a goal and target audience, it’s time to begin outbound prospecting. You can use a platform like LinkedIn to search for contacts that fit your ICP (e.g. executives, sales representatives working at companies that would be a good fit) and a contact database like Apollo or Prospect to find their email addresses.
If you’re looking for a larger number of leads in a shorter amount of time, you can also use automation tools, such as ExactBuyer or ZoomInfo. These tools take your criteria (e.g. industry, number of employees) and generate a list of companies, along with the resulting prospects (e.g. Head of Growth, VP Marketing). They eliminate a lot of the hard work that would otherwise be required to build a list, and they allow you to create a large list very quickly. The only downside might be the quality of your prospects; the contacts that automation tools choose for you just won’t be as high-quality as ones you handpick yourself.
Regardless of which solution you use, remember to check the email addresses for validity before using them. Many prospecting tools ‘guess’ at emails, based on common combinations of name + domain. I.e. jane.doe@company.com, jdoe@company.com, etc. You can do this by leveraging tools like NeverBounce or ZeroBounce, and ensuring you only send to emails that are valid. Several providers have started to include this in their prospecting solution, so it may not always be necessary, but at $0.008 per email, it’s worth the effort!
Warming up your email addresses
Business domains (i.e. divisional.co) are treated differently than free domains (i.e. gmail.com). In a lot of ways, a new domain is like a new person — the internet needs time to ensure they’re trustworthy and won’t spam people. If they’re legitimate, then email service providers (ESPs, i.e. Gmail) will route emails from them to someone’s inbox, instead of marking them as spam.
Since your email addresses aren’t unique, i.e. you already have a core email you send from, you need to give ESPs the impression that they have valid activity. This is called ‘warming up’ your email address. By slowly and gradually building up the volume of emails you send out daily, you’ll optimize your deliverability rates and improve your reputation, so that you end up in a contact’s inbox when you start your email sends.
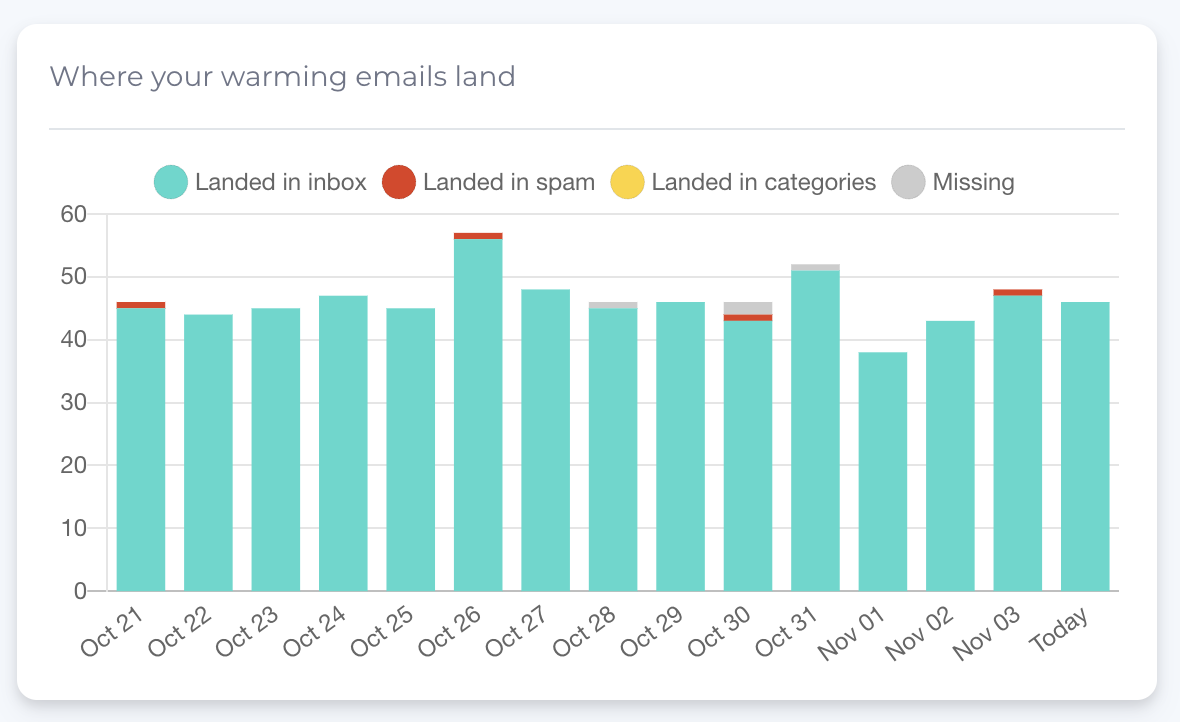
Email tools like MailReach will give you a deliverability score (out of 100) and show you how the warming is performing on a day-to-day.
Investing in a tool that automates the warmup process is usually the best option for this step. Not only does it help you save time and resources, but it also ensures your domain is warmed up properly. While you could warm your domain up manually, in the fast-paced, demanding environment of a startup, it’s often not the best use of your time.
Here are a few tools that will help to warmup your domain effectively:
- Warmup Inbox: An email warming software that works with major email service providers, such as Gmail, Outlook, and Yahoo Mail. Warmup Inbox has a network of 20,000+ inboxes that interact with your domain, and they provide reports and recommendations for your domain health. They offer a 7 day free trial.
- Mailwarm: Mailwarm is software that improves your deliverability rates by improving your sender reputation and acting as the “perfect lead” by interacting with all of your emails. They have a network of 1,000+ inboxes. Their plans start at $69/month for 50 emails a day.
- MailReach: MailReach simulates real conversations between your email address and other emails, while showing you the performance of your inbox throughout the warming period. They start at $25 per inbox, with a 20% discount when you have 5+ active inboxes.
- Quickmail Auto-Warmer: The Auto-Warmer tool in Quickmail boosts your sender reputation just like the rest of the software on this list, but this is a great option as it’s free to use (up to 50 inboxes per account).
Conclusion
Outbound email is a great addition to any SaaS email marketing strategy. By following these steps, you can ensure your outbound emails won’t land in spam folders and have a positive ROI for your startup.
If you need help building a successful outbound email strategy, Divisional can help. Get in touch with us today to learn how!